✨Punch Needle Mistakes: 5 Common Errors Beginners Make & How to Fix Them 🧶✨
Is Your Punch Needle Project Feeling a Bit… Off? 🤔
Let me guess — you started your punch needle project all excited, but punch needle mistakes are making your loops look uneven. The yarn keeps falling out, and the back looks like a bird’s nest. 😅
Hi, I’m Gizem from The Poko Design, and I want to tell you something: every single one of those problems is completely normal, completely fixable, and has happened to me too.
Punch needle is a beginner-friendly craft, but there are a few sneaky little mistakes that trip almost everyone up at first. Today I’m walking you through the 5 most common ones — and exactly what to do about them.
Let’s be real: Punch needle looks easy, but my first project was a disaster. My loops kept popping out, my fabric was too loose, and I almost gave up. Trust me, I have made every single error on this list. I’m sharing them here so you can avoid my frustrations and get to the ‘cozy joy’ part faster.
Mistake #1: Your Fabric Isn’t Tight Enough (The “Drum” Test) 🥁
This is the number one reason beginners struggle — and it’s the first thing I check when something looks wrong.
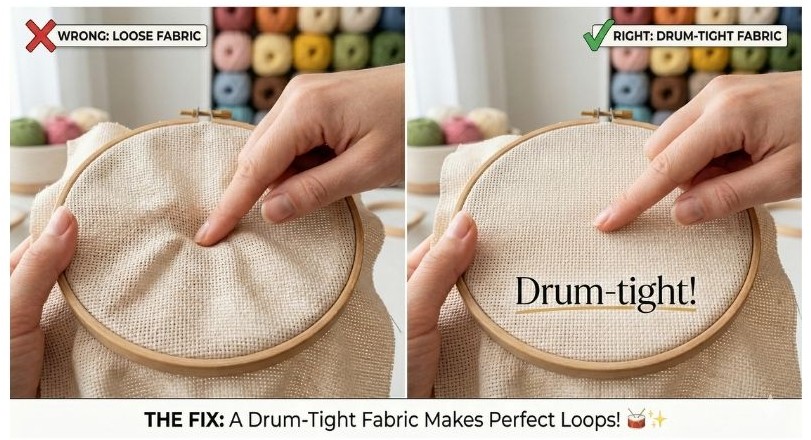
If your monk’s cloth isn’t drum-tight in your embroidery hoop, your loops won’t form properly. The needle needs resistance to push against. Loose fabric = loops that collapse, pull out, or sit unevenly.
THE FIX: Before you start punching, tighten your hoop until the fabric feels like a little trampoline when you tap it. Then re-tighten every 10–15 minutes as you work — fabric naturally loosens up as you punch through it. It feels like a lot of adjusting at first, but it becomes second nature quickly!
Quick test: tap the center of your fabric with one finger. It should make a soft drum sound, not a floppy bounce.
Mistake #2: Lifting the Needle Too High(The “Skimming” Rule)📍💨
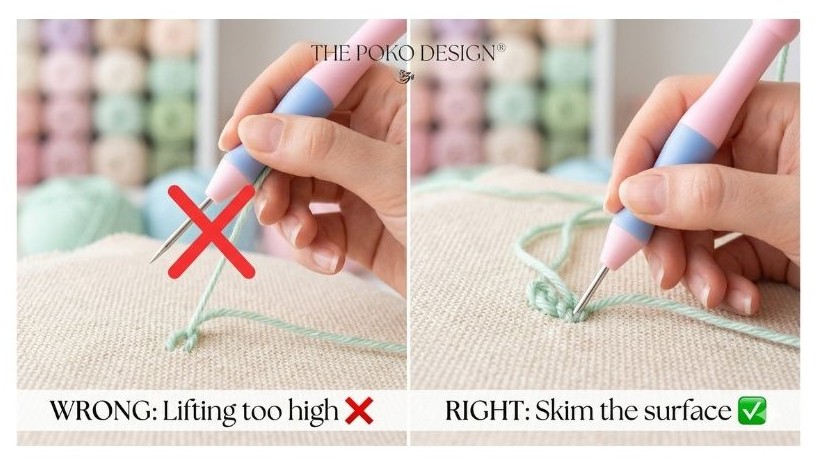
This one is so common! When you’re new, it’s tempting to lift the needle up high between each punch — it feels more controlled. But this actually pulls your previous loop right back out of the fabric. You end up punching the same spot over and over with nothing to show for it.
THE FIX: After each punch, drag the needle tip along the surface of the fabric to the next spot — don’t lift it into the air. Think of it like drawing on the fabric rather than stamping it. The needle should barely skim the surface as you move between punches.
Once you get this motion right, you’ll suddenly see those satisfying loops appearing on the front side and you won’t be able to stop. 🎉
Mistake #3: Getting the Spacing Wrong (Too Sparse vs. Too Crowded) 📏🧵
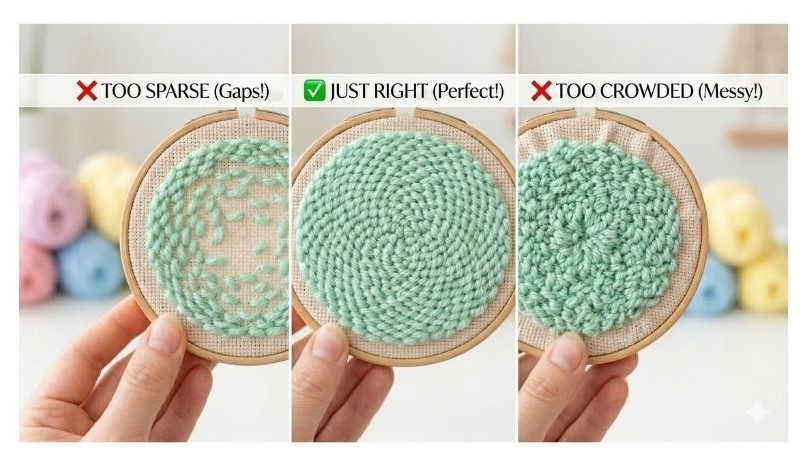
Spacing matters more than most beginners realize. Punch too far apart and you’ll see fabric showing through your design on the loop side — it looks thin and unfinished. Punch too close together and the fabric gets overworked and distorted.
THE FIX: Aim for about 2–3 punches per centimeter. Your rows should be close enough that no fabric peeks through, but not so crowded that the fabric puckers. A good rule of thumb: each new punch should sit about one thread of fabric away from the last one.
If you spot a gap after finishing an area, don’t panic — just go back and add a few extra punches to fill it in. The fabric is very forgiving!
✨ Ready to start? Browse Poko’s Best-Selling Digital Templates Here! ✨
Mistake #4: Using the Wrong Fabric (Why Monk’s Cloth is Your Best Friend) 🐑💪
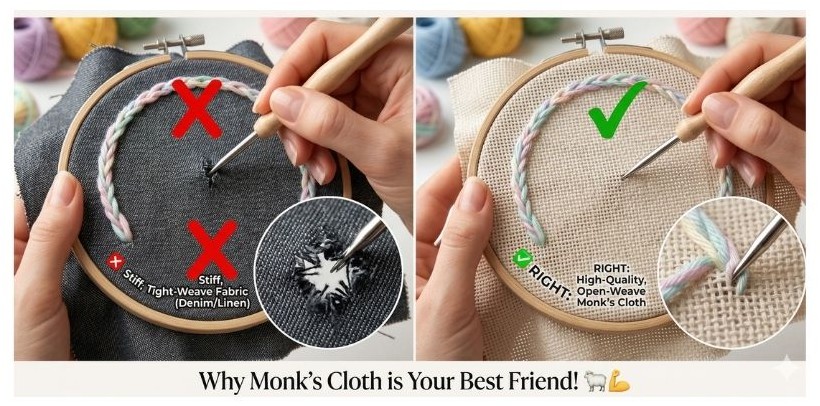
This one can make punch needle feel impossibly hard — and it’s not your fault at all. Not all fabric works for punch needle. Regular cotton, felt, or canvas will fight your needle every single step of the way.
Punch needle requires a fabric with an open, even weave so the needle can pass through smoothly with yarn. The most beginner-friendly options are monk’s cloth and weavers cloth — they’re specifically designed for this craft.
THE FIX: If you’ve been struggling with your fabric, switch to monk’s cloth. It’s widely available online and at craft stores, and it makes punch needle feel like a completely different (much easier!) experience.
One more tip: always work with the fabric grain straight in your hoop. If the weave is on a diagonal, your loops will look uneven no matter how perfectly you punch.
Mistake #5: Skipping the Finishing Steps (Don’t Let Your Work Fall Apart!) 🧴✨
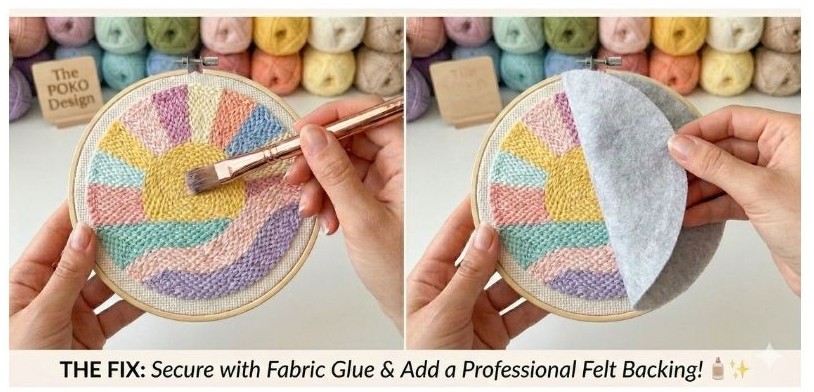
You’ve finished punching, it looks beautiful — and then you pull it out of the hoop and the loops start coming loose. 😱 This happens when people skip (or rush) the finishing step.
Punch needle loops are not locked in place on their own. They stay put through tension and friction — but once the fabric relaxes out of the hoop, they need a little help to stay secure.
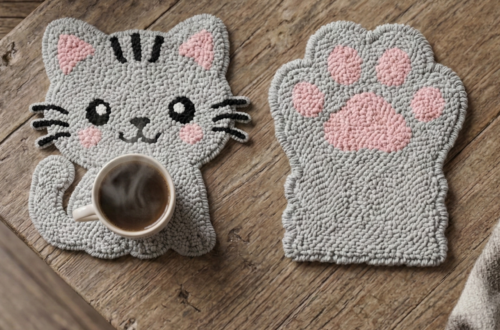
THE FIX: Once your project is complete, apply a thin, even layer of fabric glue across the entire back of your work. Let it dry flat and completely before handling. For coasters or items that will get regular use, a piece of non-slip rug backing glued to the back works even better — it locks the loops AND protects your surfaces.
Don’t skip this step! It takes 5 minutes and makes the difference between a project that lasts years and one that falls apart after a week.
Ready for a Foolproof Project? Visit The Poko Design on Etsy! 🛍️🧶
Here’s the truth about punch needle mistakes: they’re all fixable, and making them is how you learn. Every experienced punch needle crafter has pulled out their loops in frustration at least once (okay, many times). It’s part of the process. 💛
The single best thing you can do to set yourself up for success is to start with a well-designed, beginner-friendly pattern — one with clear outlines, manageable shapes, and just the right size. When your pattern works with you instead of against you, everything else becomes so much easier.
If you’re looking for your next project, I design all my punch needle patterns with beginners in mind — clean lines, colorful designs, and just the right size to build your skills and confidence. You can browse my full collection in my Etsy shop, The Poko Design.
→ Shop beginner-friendly punch needle patterns on Etsy: THEPOKODESIGN
Happy punching — mistakes and all! 🧡 — Sibel


You May Also Like
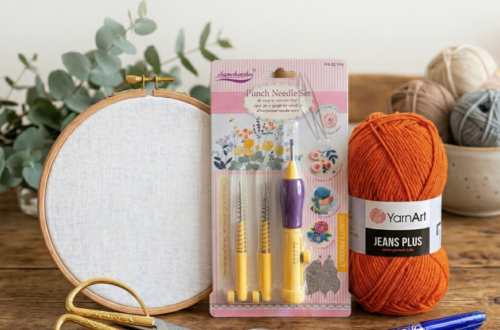
Punch Needle Supplies for Beginners: Everything You Need to Get Started

🧶 DIY Punch Needle Keychain: The Ultimate Step-by-Step Guide