How to Use Letter Templates in Punch Needle: 10 Creative Ideas You’ll Actually Love
It all started with a simple birthday banner.
When a friend asked for a handmade touch for her daughter’s first birthday, I grabbed my monk’s cloth and a letter template. Three evenings later, I had a fluffy, textured name banner that made the party photos extra special.
That is the magic of punch needle letter templates. They seem like basic shapes, but what you can create with them is incredibly meaningful.
If you are wondering what to do with your templates beyond the classic hoop, this post is for you. Here are 10 fun, tested ideas—from quick weekend projects to heartfelt gifts you’ll absolutely love.
First, Let’s Talk About Templates
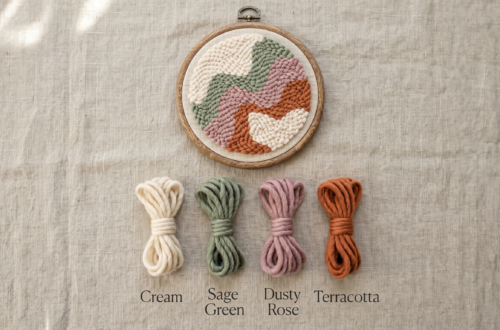
Before we dive into the projects, let’s look at the tools. I design and use two specific styles of templates, which you can find in my shop, The Poko Design:
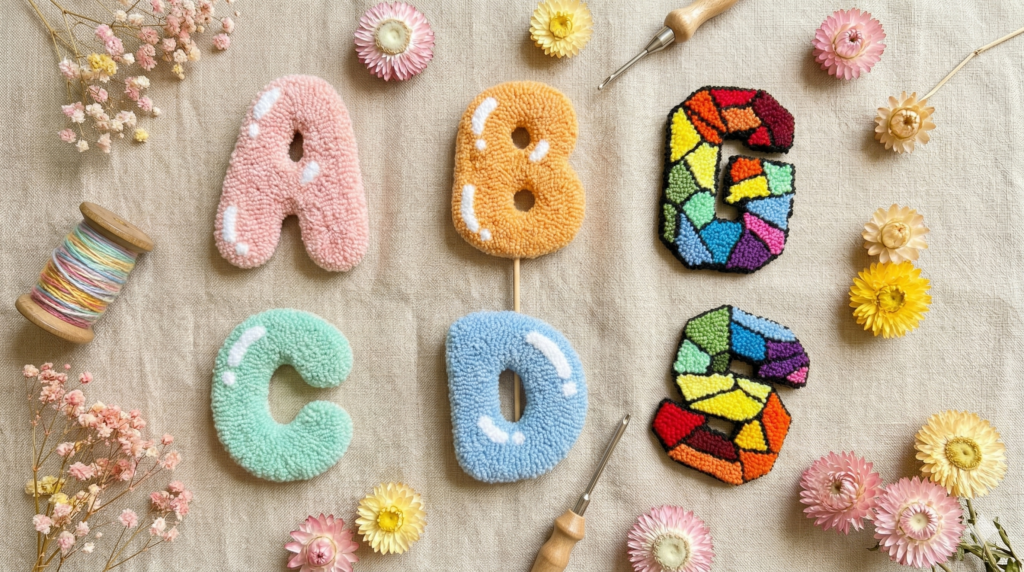
- Mosaic Pattern (Flat): This style has clean, graphic lines. It is fantastic for a bold, modern look and works beautifully when you want your letters to feel structured and crisp.
- Bubble Pattern (Round): These feature soft, rounded shapes with a playful, friendly feel. They are absolutely perfect for kids’ projects, baby shower gifts, and anything that needs a little extra warmth.
Both styles come in two sizes: 10 cm and 5 cm. Size matters more than you might think for these projects, so I will point out which size works best for each idea below!
You can find both of these digital templates right here in:
10 Fun Ways to Use Your Letter Templates
1. The Fluffy Cake Topper
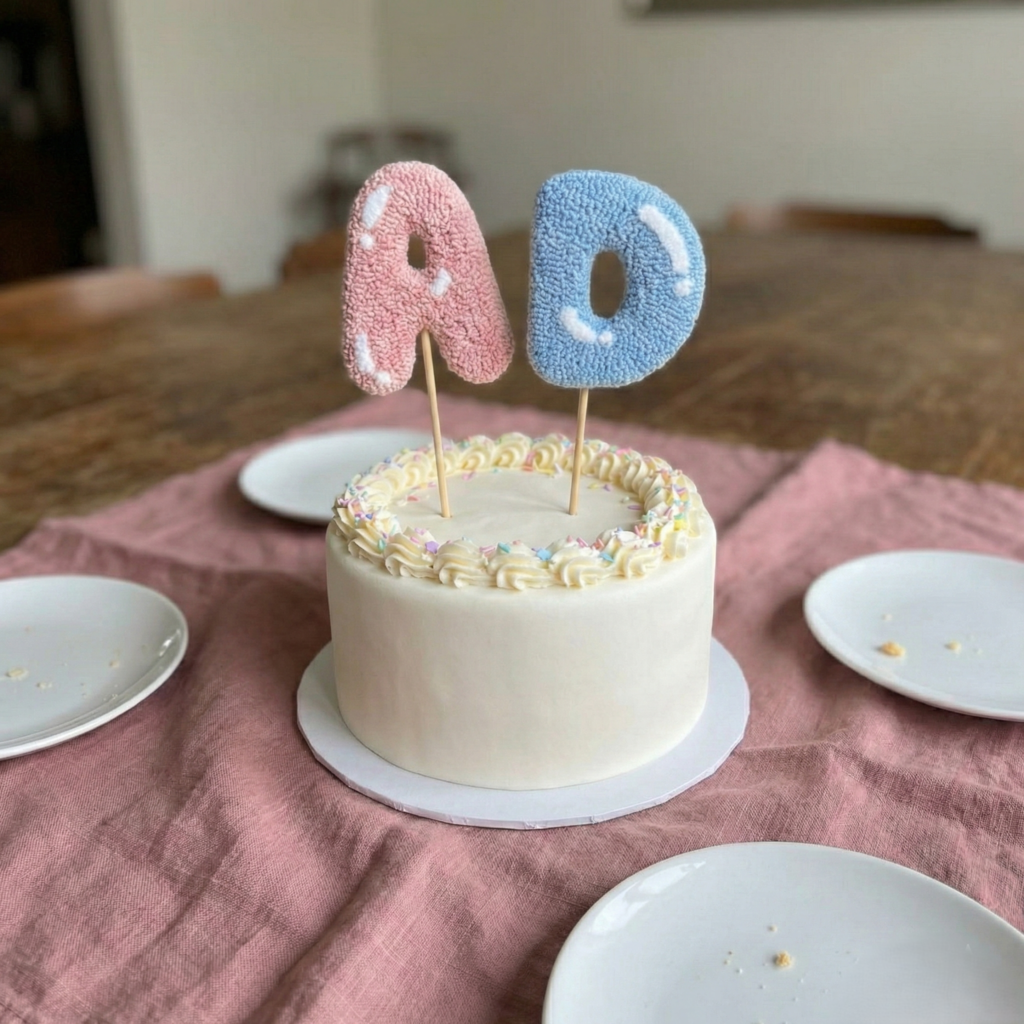
This is genuinely one of my favorite uses. You can spell out “ONE,” “TWO,” a short name, or simply use a single initial. Punch the letters, attach each one to a small wooden skewer, and press them into the cake. The fluffy texture looks incredible and photographs like a dream.
Best Style: Bubble pattern for a soft, celebratory look.
Best Size: 10 cm for maximum visual impact on the cake.
Tip: Use yarn colors that perfectly match the party palette. Even a simple white-on-white texture looks incredibly elegant!
2. A Keepsake Birthday Banner
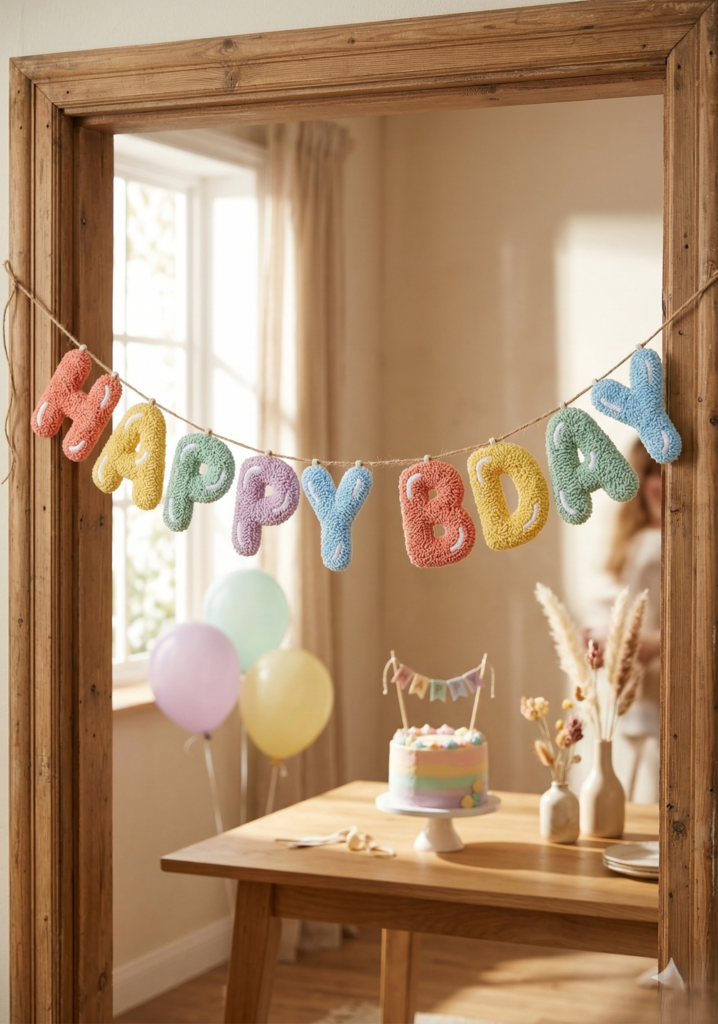
String individual letter hoops or cut-out punched letters together with ribbon or natural twine. You will instantly have a banner that no store-bought decoration can ever compete with. Hang it above a gift table, a doorway, or use it as a photo backdrop.
Best Size: 10 cm if you want it to be readable across a room, or 5 cm for a more delicate look.
Tip: Make the banner reusable! Spell out “HAPPY BDAY” and bring it out for every single family celebration year after year.
3. The Boutique-Style Tote Bag
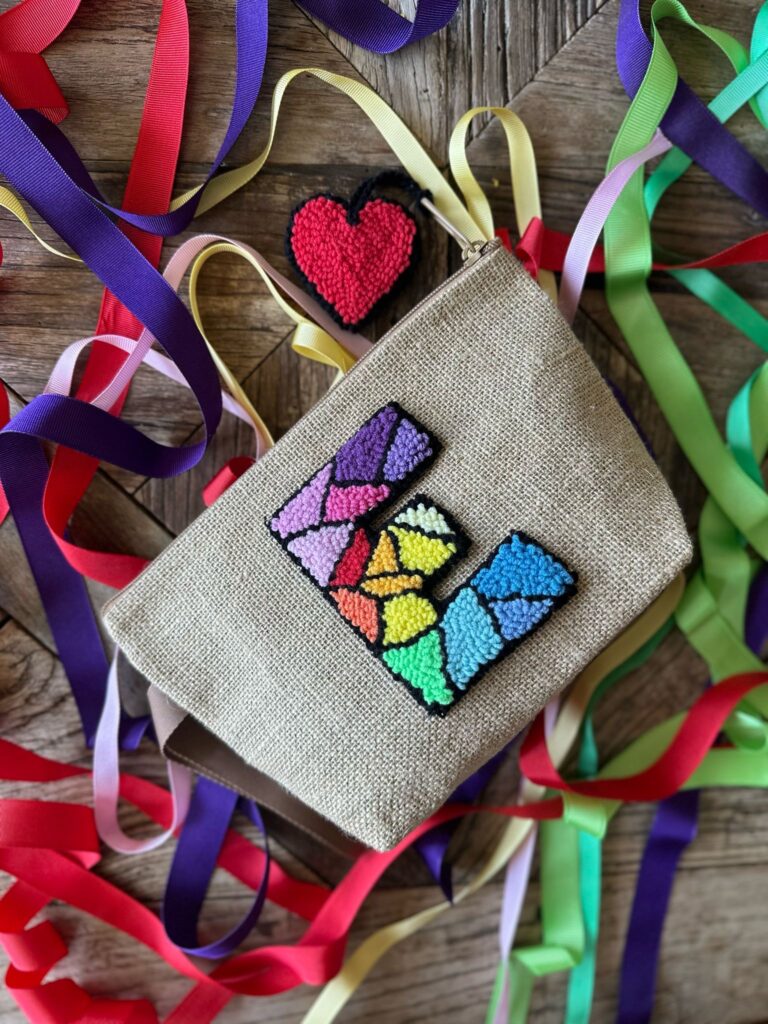
Punch a single initial, back it properly with fabric glue or felt, and hand-stitch it onto a plain canvas tote bag. The result looks exactly like something you would buy in a high-end boutique, but it only costs you a quiet evening and a ball of yarn.
Best Style: Mosaic pattern gives it a very chic, modern feel.
Best Size: 10 cm for a big statement initial, or 5 cm for a subtle corner detail.
4. Textured Nursery Wall Art
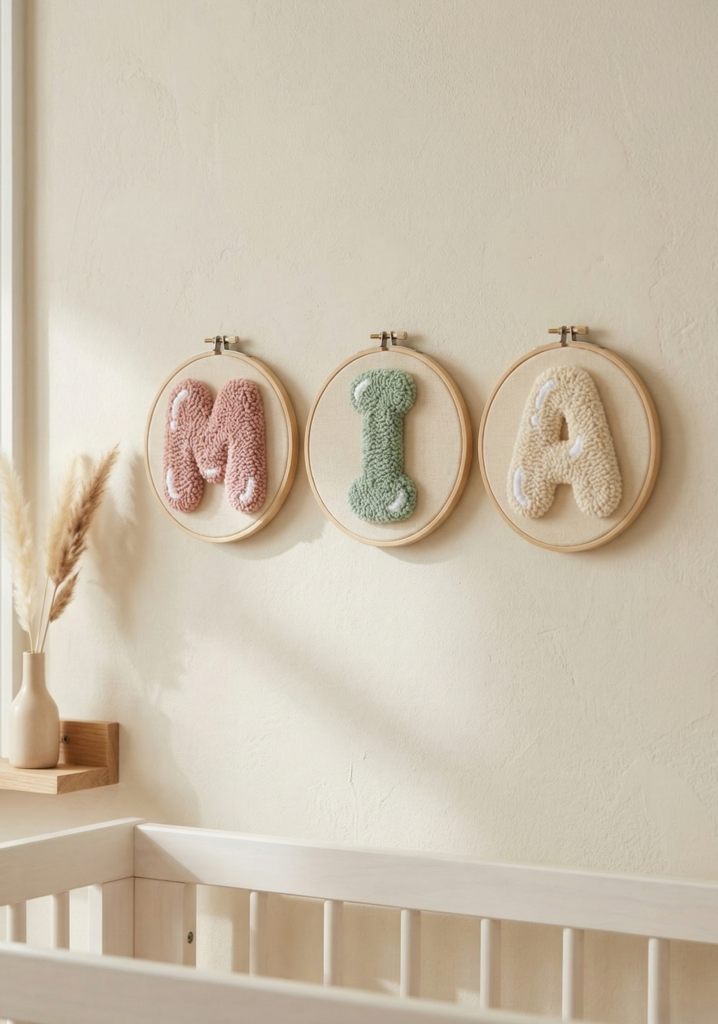
Punch a baby’s name, frame each letter individually, and hang them in a neat row above the crib or changing table. It is soft, highly textured, and completely handmade. This is the kind of meaningful decor that stays on the wall long after the nursery turns into a big-kid bedroom.
Best Style: Bubble pattern- it was practically made for nurseries!
Best Size: 10 cm for great wall presence.
5. Custom Keychains and Bag Charms
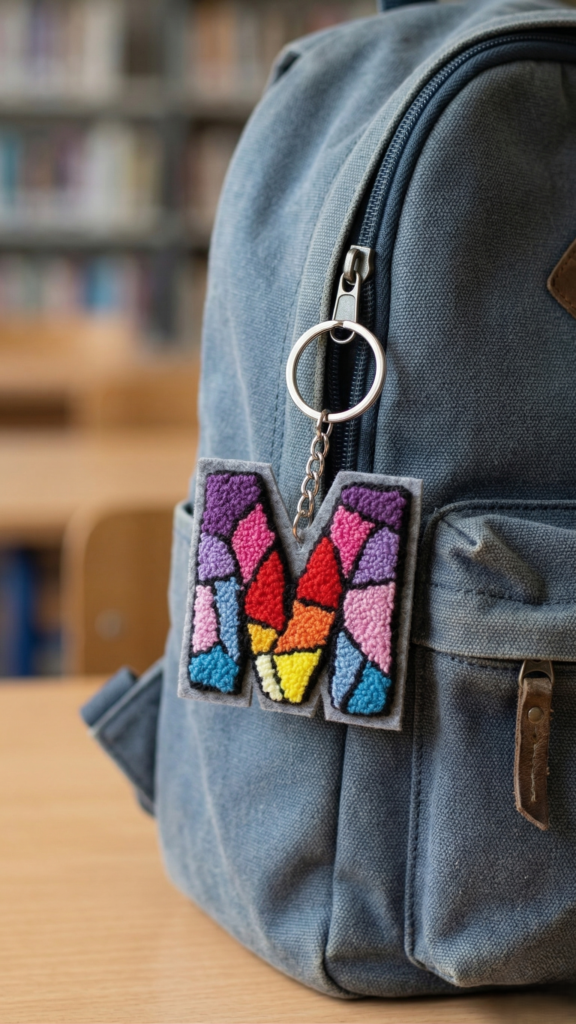
Our smaller templates shine here. Punch a single letter, back it securely with stiff felt, attach a keyring, and you have a tactile, colorful charm. Kids love these for their school backpacks!
Best Size: 5 cm is the perfect, pocket-friendly size for this.
Tip: If you sell your punch needle work at craft fairs, these are amazing best-sellers. People always love an affordable, personalized item.
6. Gift Tags (That Double as Gifts!)
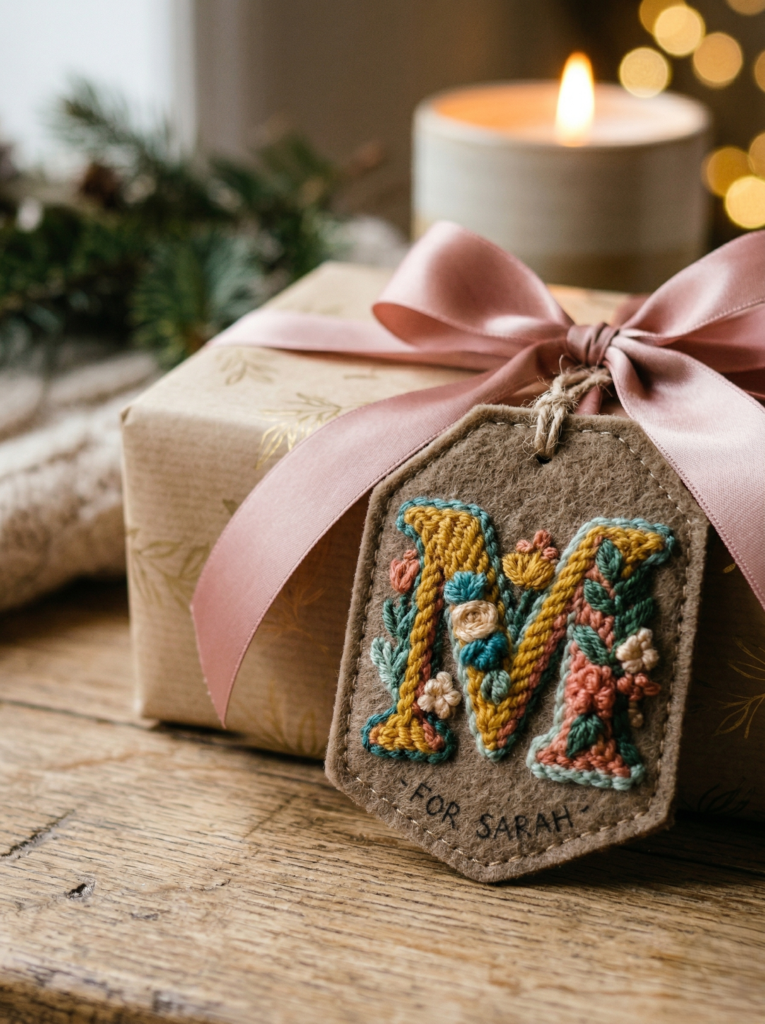
Punch the recipient’s initial and tie it onto their gift box with a pretty ribbon. Suddenly, your wrapping is actually part of the gift. I promise you, they will keep the tag long after they have forgotten what was inside the box!
Best Size: 5 cm keeps it looking like a delicate tag.
7. The Book Lover’s Bookmark
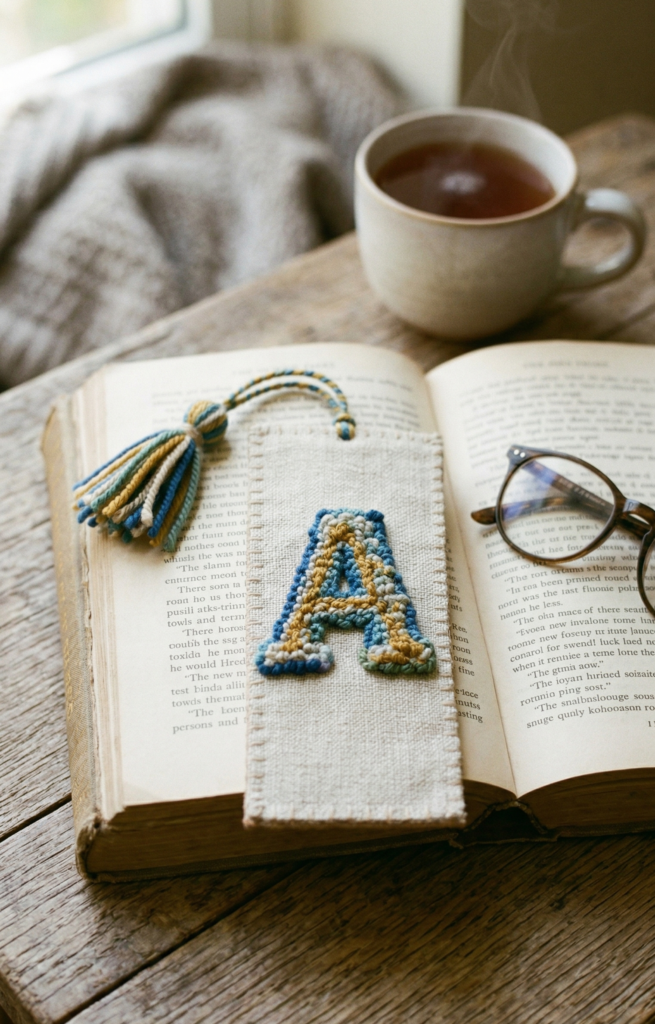
This one is slightly unconventional, but it is so lovely. Punch a letter on a narrow strip of fabric, finish the back smoothly, and add a little yarn tassel at the top. It is a wonderful gift for teachers, students, or anyone who still loves the feel of a real physical book.
Best Size: 5 cm so it stays slim enough for the pages.
8. Heirloom Holiday Ornaments
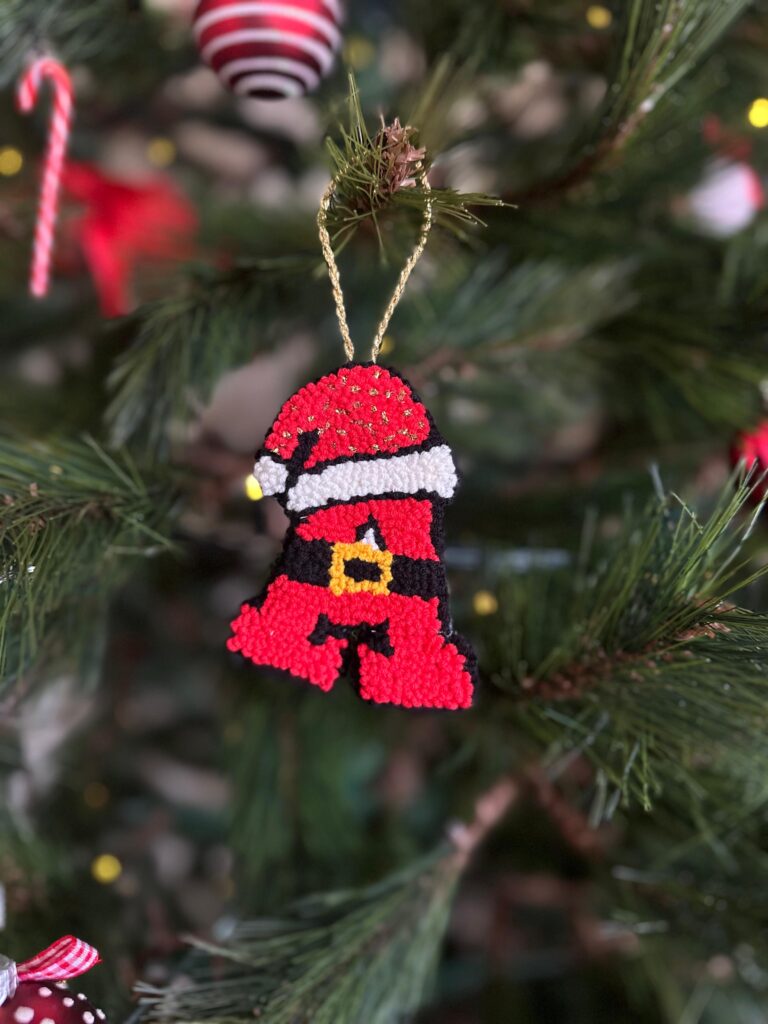
Make a family initial or punch the first letter of a child’s name in festive colors. Back it with felt, add a velvet ribbon loop, and hang it on the tree. Every year when you pull it out of the holiday box, it brings back sweet memories of making it.
Best Style: Bubble pattern brings out that cozy, traditional holiday feel.
Best Size: 5cm or 10 cm, depending on how large your tree is.
9. The Statement Denim Jacket Patch
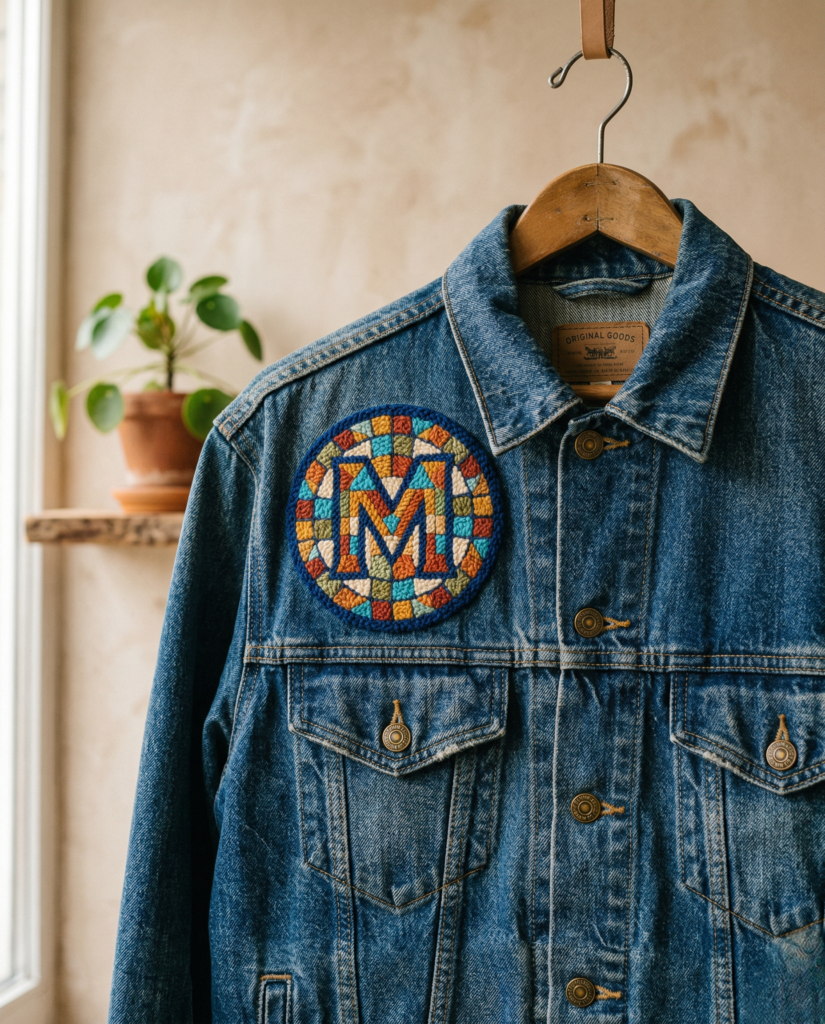
This is the project that will make people stop you in the street to ask where you bought your jacket. Punch your initial, back it carefully with iron-on interfacing to secure the loops, and sew it onto your favorite denim jacket. It is a true statement piece.
Best Style: Mosaic pattern—the sharp, clean lines look incredible against rugged denim.
Best Size: 10 cm for maximum impact.
10. A Piece That’s Just For You

We spend so much time making things for other people. Why not make something just for your own space? Punch your own initial, or a letter that represents a word that inspires you (like “C” for Create). Frame it nicely and put it on your desk, in your craft room, or on your living room bookshelf. You deserve to enjoy your own beautiful handiwork, too!
Best Size: 10 cm so it stands out on a shelf.
I hope these ideas give you a little spark of inspiration to pick up your punch needle today! Which project are you going to try first? Let me know in the comments below, or tag me over on Pinterest or Instagram so I can see your beautiful creations.
Happy punching! – Sibel


You May Also Like
WHERE DOES A PUNCH NEEDLE PIECE ACTUALLY LIVE?
5 Beautiful Ways to Use Your Boho Punch Needle Coaster Pattern